Многие сталкиваются с необходимостью сделать снимок экрана, но как все-таки правильно сказать принтскрин, скрин, скриншот или скрин шот? Само слово вошло в виде неологизма в русский язык из английского. В основу было взято слово ScreenShot.
Если рассматривать дословно, то Screen с английского переводится как «экран», а Shot, это «снимок». Дословно ScreenShot – это снимок экрана.
Так как это сочетание двух слов используется в едином контексте, то правильнее было бы сказать слитно – «скриншот». Однако в сети можно увидеть различные написания слова.

Содержание
- Как сделать скриншот?
- Способ 1. Делаем скриншот нажатием клавиш
- Способ 2. Как сделать скриншот при помощи сторонних программ.
Как сделать скриншот?
Снимок экрана можно сделать на любом гаджете, начиная от ПК и ноутбуков, и заканчивая смартфонами. Сделать это можно несколькими способами: при помощи нажатия одной или комбинации клавиш или при помощи специальных программ.

Способ 1. Делаем скриншот нажатием клавиш
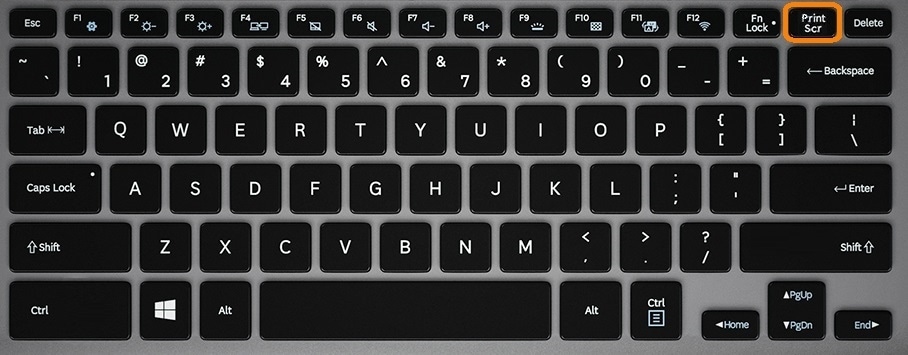
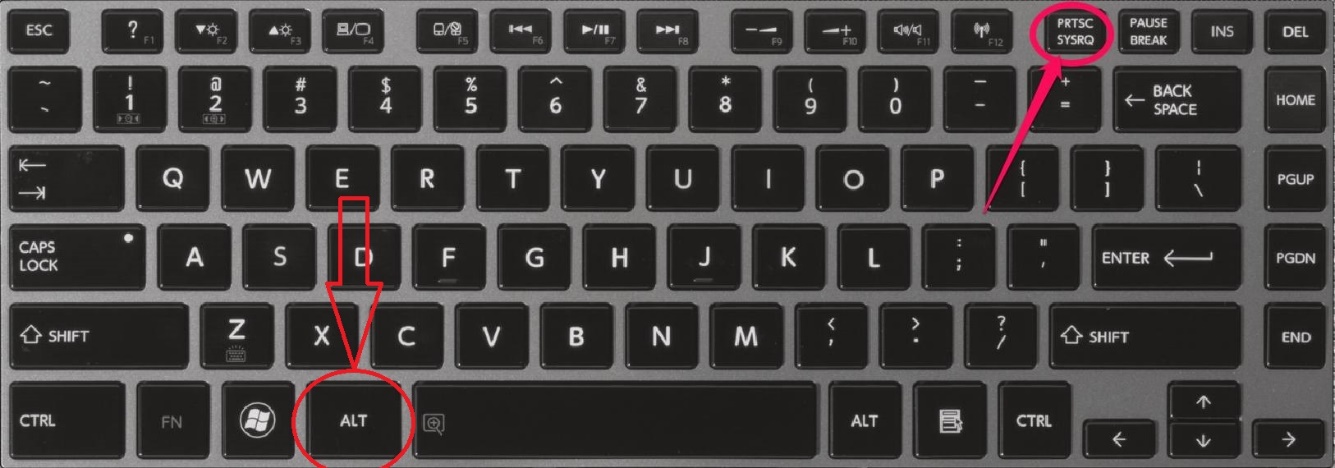
Для создания самого простого снимка на пользовательской клавиатуре предусмотрена клавиша PrintScreen (PrtSc). Найти ее можно в правой верхней части, где расположены функциональные клавиши.
Для того, чтобы сделать скрин потребуется:
- Открыть на экране все окна, которые необходимо запомнить.
- Найти и нажать на клавиатуре клавишу PrintScreen.
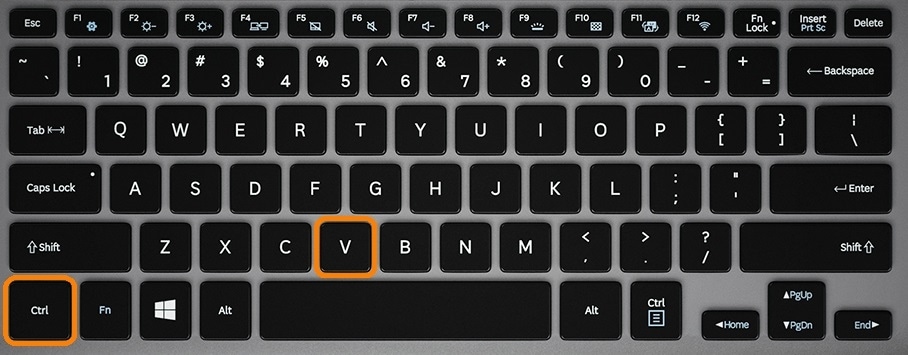
- Вставить изображение в выбранное пространство (тело письма, текст в Word, редактор Paint) при помощи сочетания клавиш Ctrl+V.


Способ 2. Как сделать скриншот при помощи сторонних программ.
Любое ПО уникально, и разработчик вкладывает в него свои функции. Описать каждое из них будет нудно и долго, поэтому лучше остановиться на перечне самых известных.
Программы для создания скринов способны отредактировать снимок экрана, сохранить только выбранный участок, загрузить изображение на свой сервер для удобной передачи ссылки пользователю.
Среди программ, создающих скриншоты, наибольшей популярностью пользуются:
- LightShot;
- Скриншот Pro;
- Movavi;
- Monosnap;
- ScreenShooter;
- PicPick;
- Snagit;
- FastStone Capture;
- Clip2Net;
- Ashampoo Snap.

Равноценно будет сказать «сделай скрин», «скинь скриншот», «дай принтскрин». Эти фразы стаи синонимом одного простого действия – снимка экрана.
Без снимка экрана пользователю тяжело объяснить собеседнику то, что происходит у него на экране. Новые слова, пришедшие к нам из английского языка, не всегда легко воспринимаются, однако слово «скриншот» быстро вошло в лексикон пользователей.
Есть 2 способа:
- кнопка «Print Screen»
- кнопки «Windows»+»Shift»+»S» (сразу можно выбрать нужную область для скриншота)
Первый способ: кнопка «Print Screen»
На компьютере: нажмите клавишу «Print Screen».
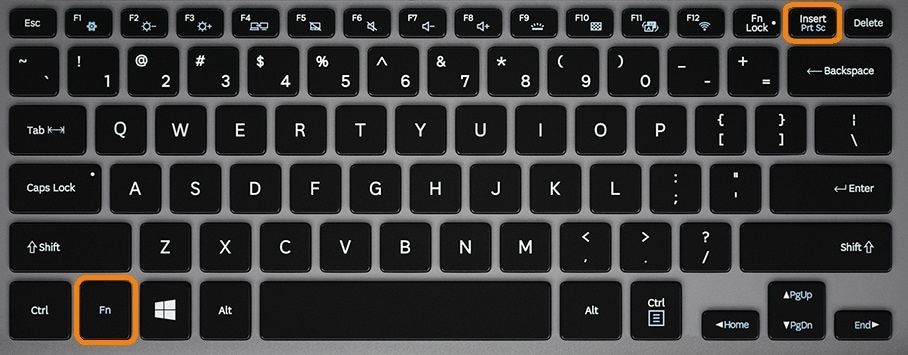
На ноутбуке: нажмите одновременно клавишу «Fn» и «Print Screen».
На любой клавиатуре предусмотрена специальная клавиша для снятия скриншотов — «Print Screen». Иногда она подписана иначе — например, «PrntScrn», «PrtScn», «PrtScr» или «PrtSc». Также она может быть совмещена с какой-то другой, например, «Insert».
Cкриншот сохранится в буфер обмена, и вы сможете использовать его — вставлять в программы, чаты и т.д.
Визуально ничего не изменится, но компьютер «запомнит» скриншот — то есть сохранит его в так называемый буфер обмена. Чтобы посмотреть скриншот, вам нужно его куда-то поместить: в переписку, e-mail, графический редактор — например, paint и т.п. Для этого нажмите одновременно клавиши Ctrl+V в том месте, куда будете помещать скриншот.
Первый способ — подробнее
Если у вас компьютер, нажмите кнопку «Print Screen».
Если у вас ноутбук, нажмите одновременно две кнопки: «Print Screen» и «Fn».
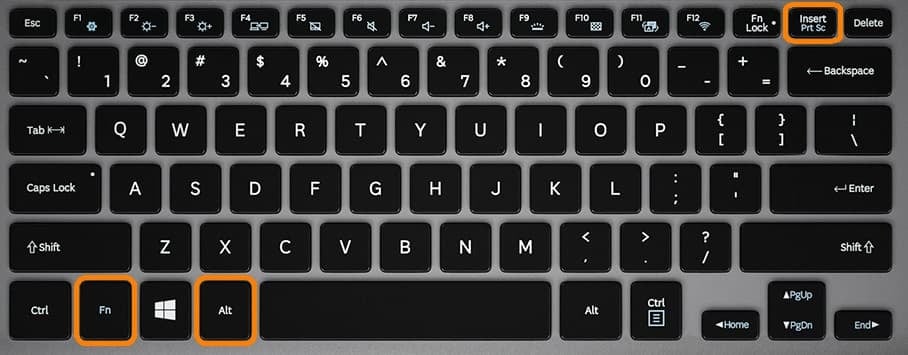
Если хотите сделать скриншот только активного окна (программы), нажмите одновременно «Alt» и «Print
Screen» на компьютере; «Alt», «Print Screen» и «Fn» — на ноутбуке.
Скриншот сохранится в буфер обмена. Теперь можно вставить его в письмо, фоторедактор или Word (нажать одновременно
кнопки «Ctrl» и «V»), а также сохранить в отдельный файл.
-
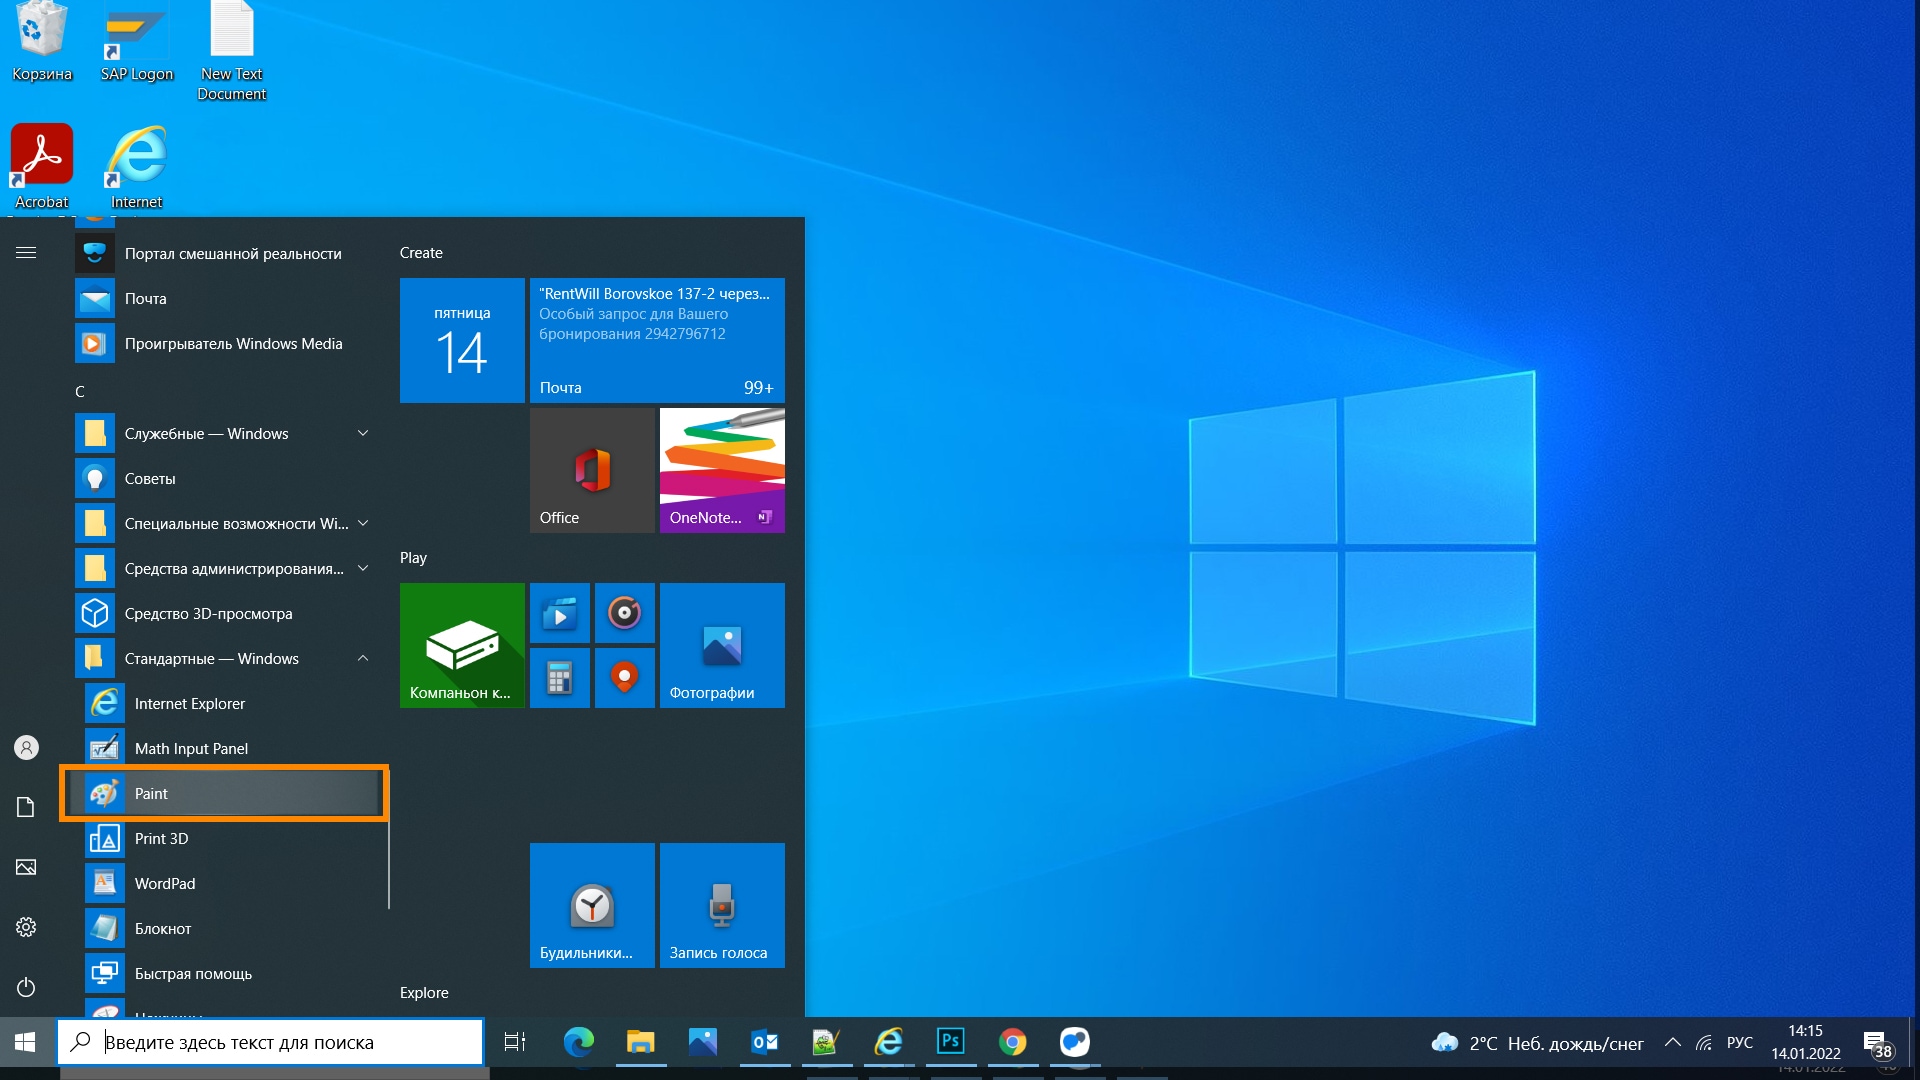
После того, как сделали скриншот, нажмите кнопку «Пуск» > «Стандартные» > «Paint«.

Или в поле поиска напишите «Paint».
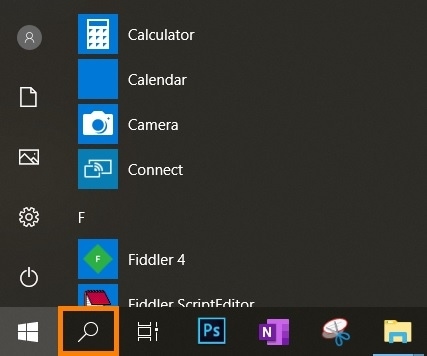
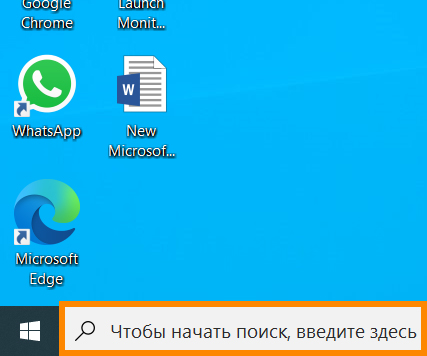
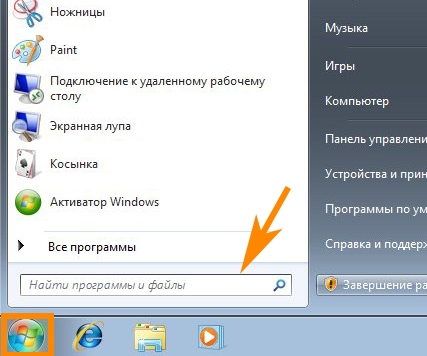
Где найти поле поиска?
В зависимости от версии Windows поле поиска
— появляется при нажатии кнопки с лупой:
— находится прямо в трее:
— или появляется при нажатии кнопки Пуск:
-
Нажмите одновременно две кнопки: «Ctrl» и «V». На экране появится ваш скриншот.

-
Нажмите одновременно две кнопки: «Ctrl» и «S».
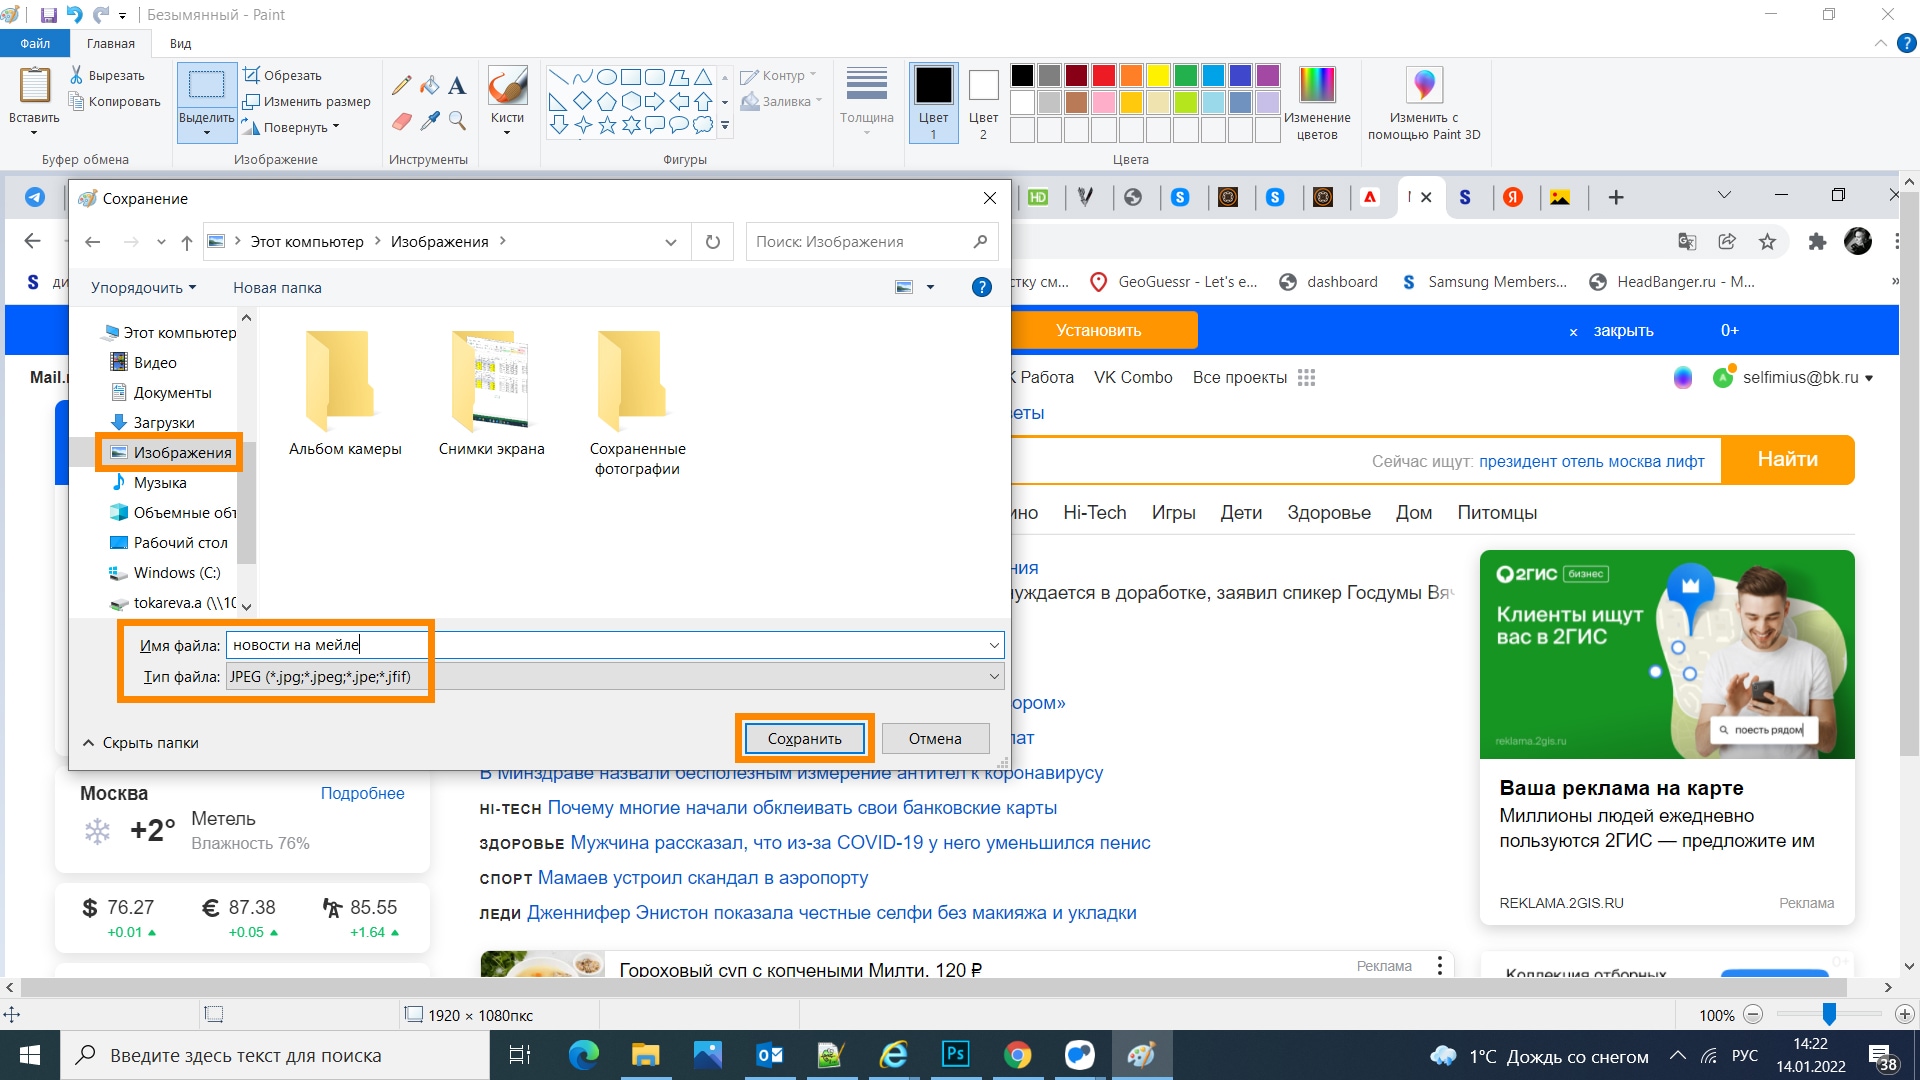
-
Появится окно для сохранения. Напишите имя файла и выберите место сохранения. Тип файла лучше
использовать JPEG.
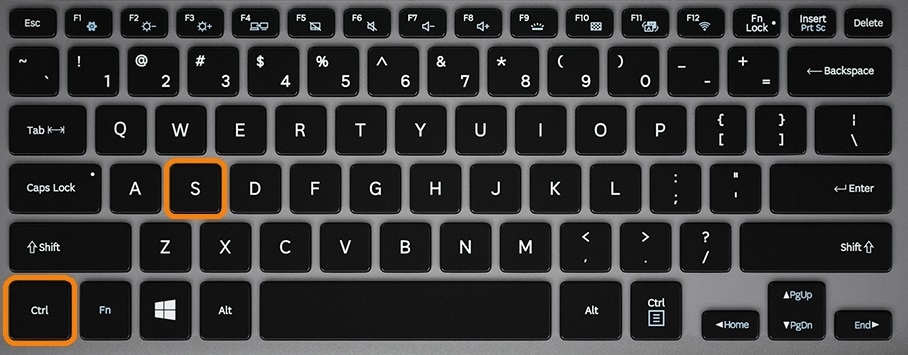
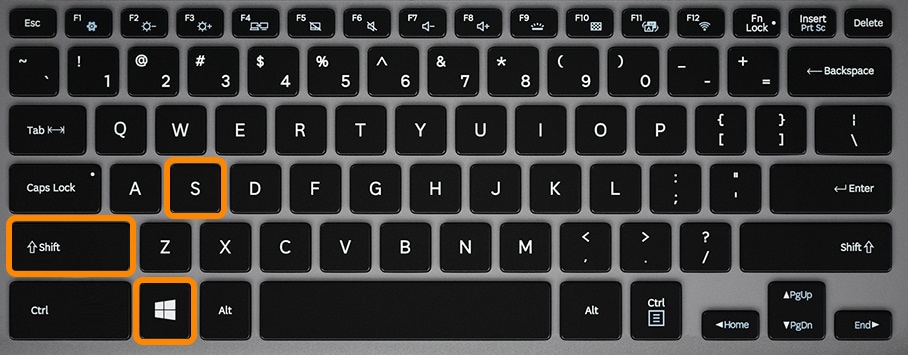
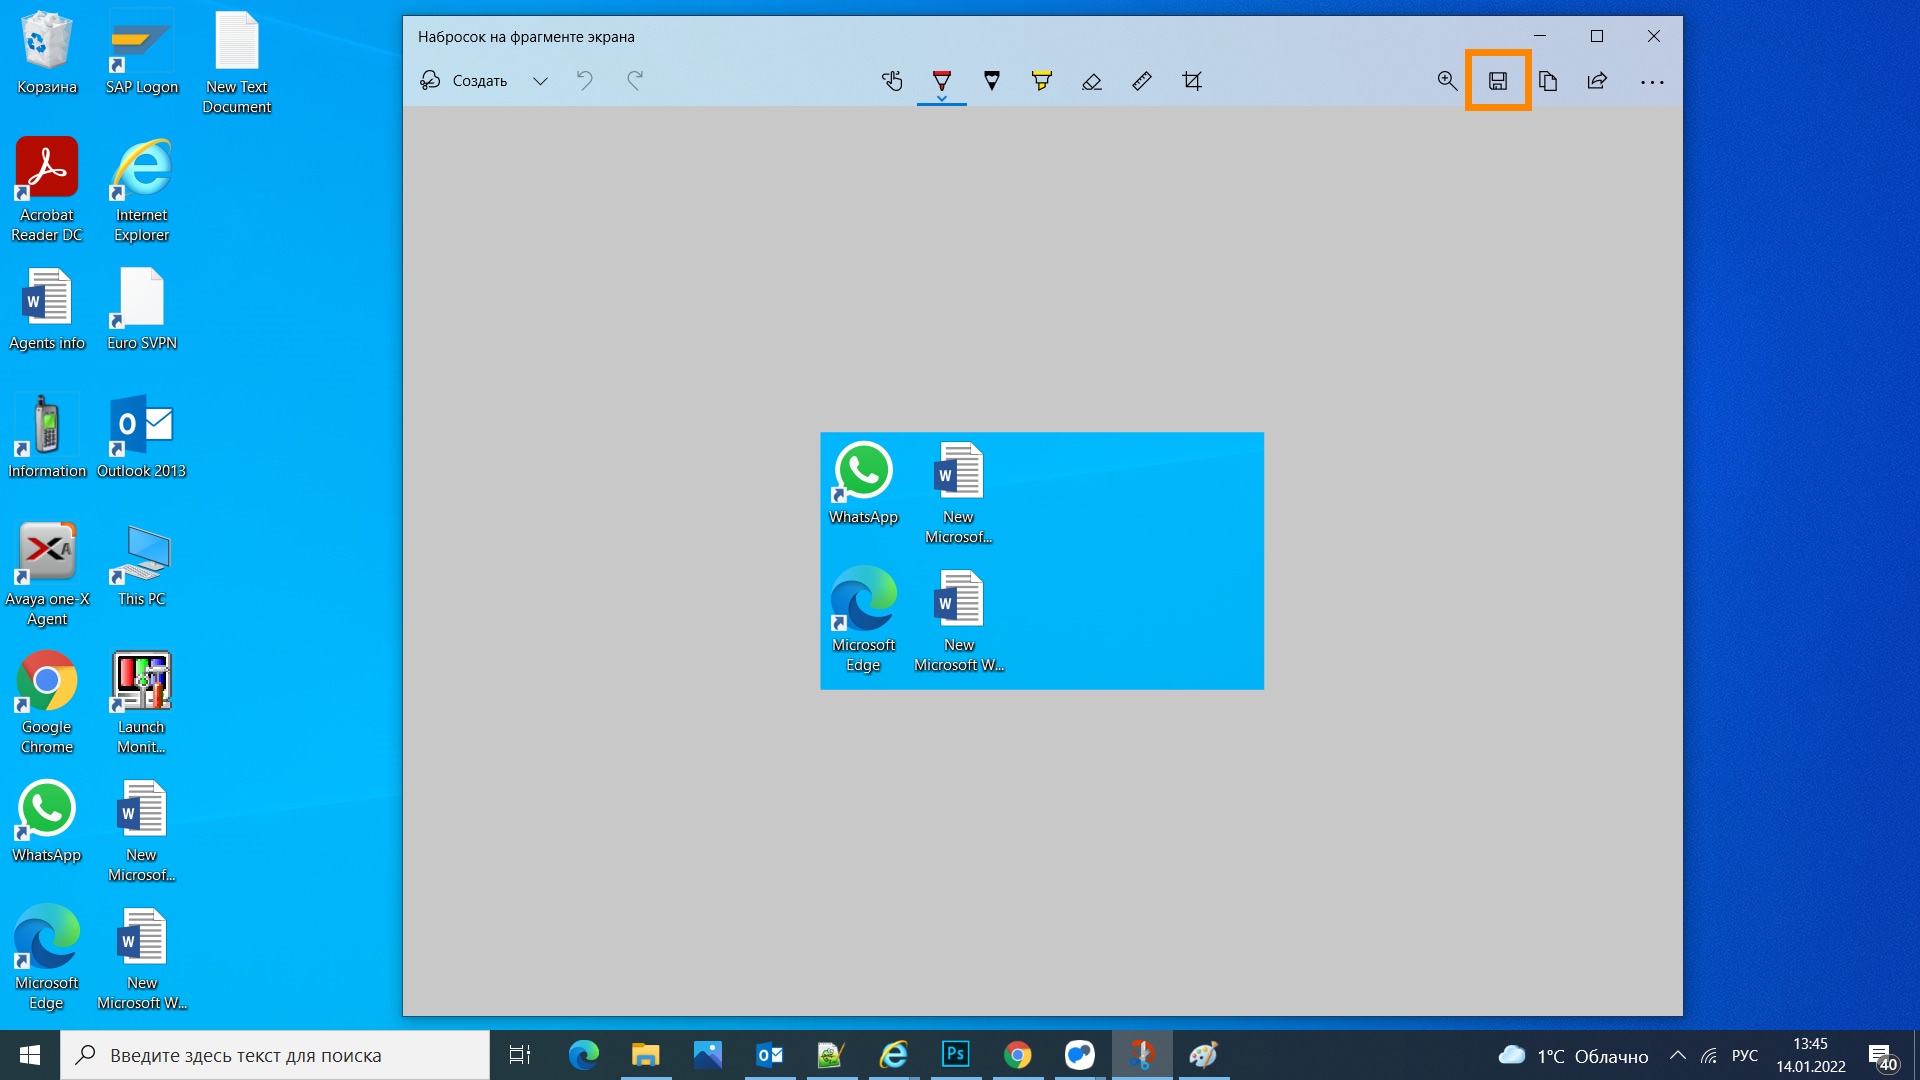
Второй способ: кнопки «Windows»+»Shift»+»S»
На компьютере и ноутбуке: одновременно нажмите кнопки «Windows»  +»Shift»+»S» и выделите нужную часть экрана.
Данная комбинация кнопок запускает программу «Набросок на фрагменте экрана». Эта программа есть в Windows 7, 8, 8.1, 10.
Второй способ — подробнее
-
Нажмите одновременно клавиши «Windows», «Shift» и «S».

-
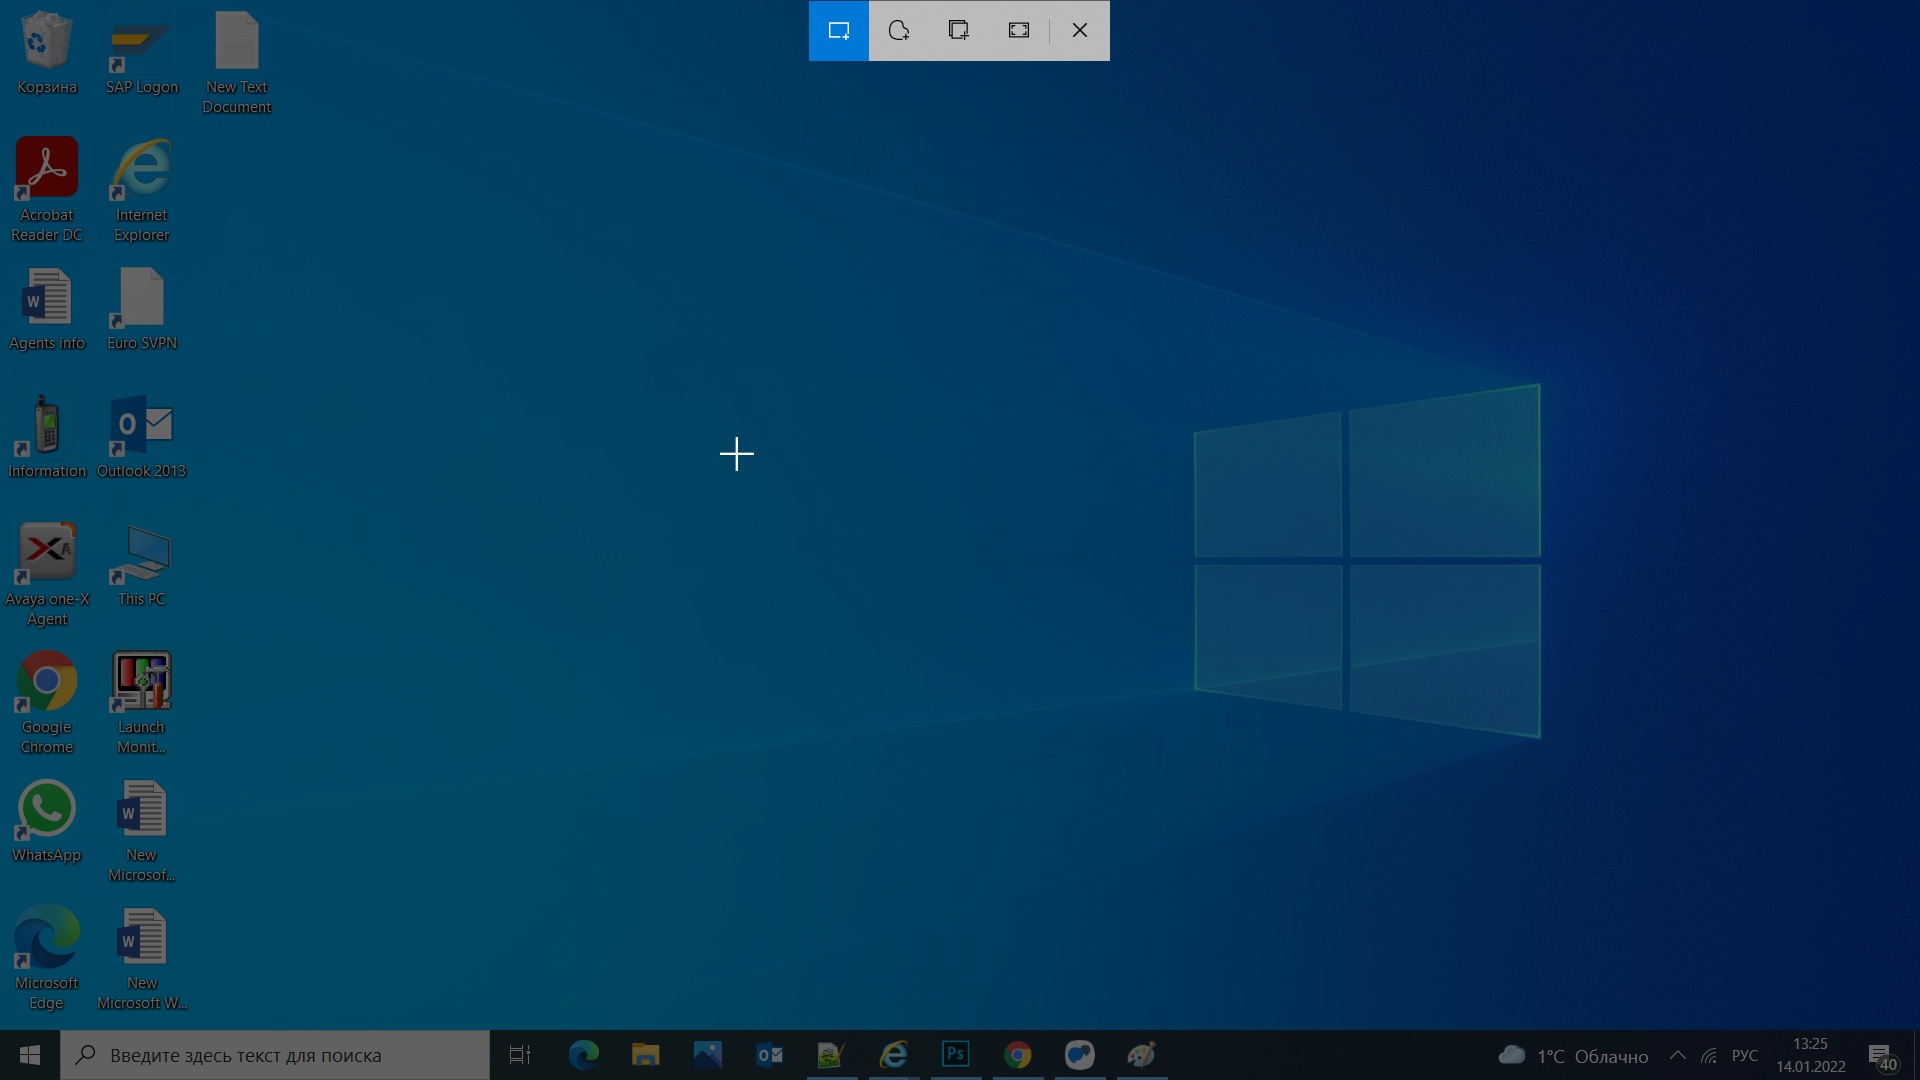
Программа запустится и вместо курсора мыши появится крестик. Удерживая нажатие на левой кнопке мыши, выделите нужный кусок экрана.
-
Скриншот сохранится в буфер обмена.
Визуально ничего не изменится, но компьютер «запомнит» скриншот — то есть сохранит его в так называемый буфер обмена. Чтобы посмотреть скриншот, вам нужно его куда-то поместить: в переписку, e-mail, графический редактор — например, paint и т.п. Для этого нажмите одновременно клавиши Ctrl+V в том месте, куда будете помещать скриншот.
-
Нажмите на значок дискеты в правом верхнем углу.
-
Появится окно для сохранения. Напишите имя файла и выберите место его для сохранения. Тип файла лучше
использовать JPG.
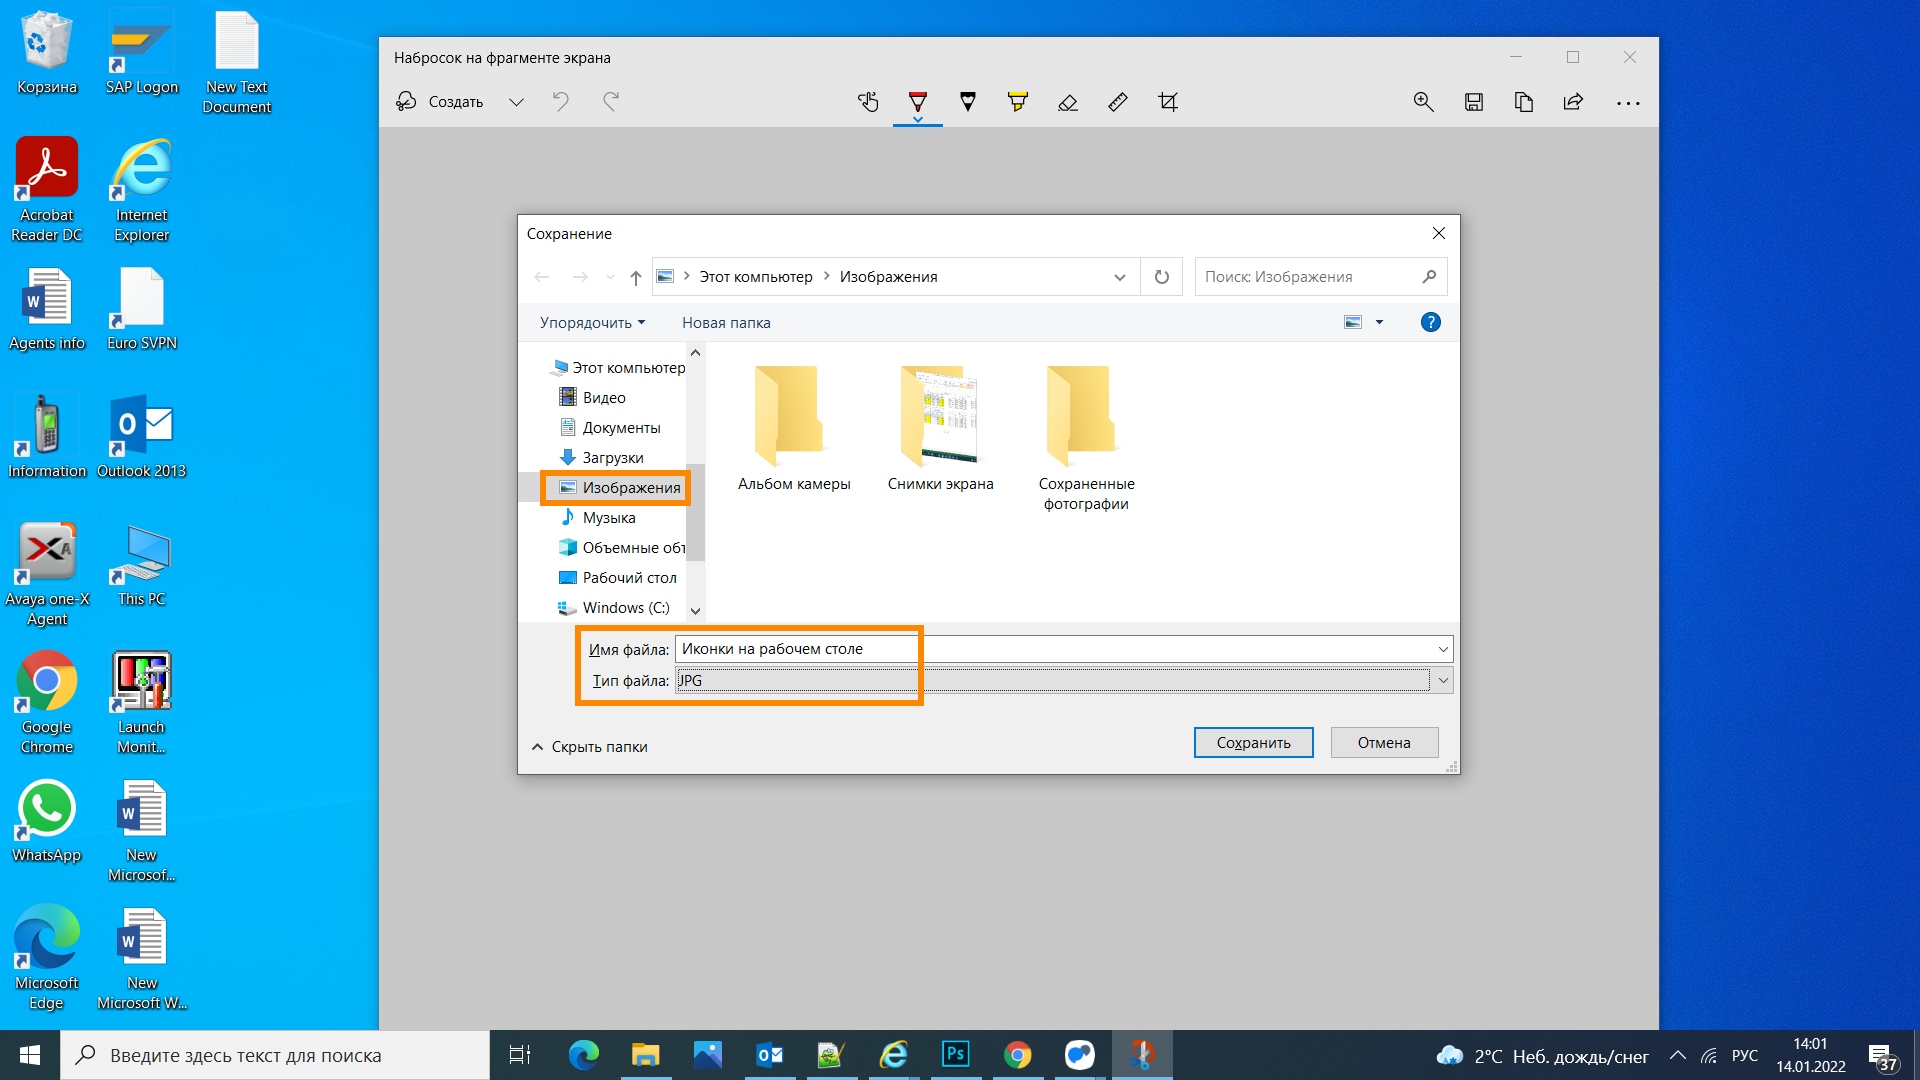
Где найти скриншоты
В той папке, которую выбирали при сохранении. Лучше хранить скриншоты в папке «Изображения».
A screenshot of a computer display
A screenshot (also known as screen capture or screen grab) is a digital image that shows the contents of a computer display. A screenshot is created by the operating system or software running on the device powering the display.
Additionally, screenshots can be captured by an external camera, using photography to capture contents on the screen.
Screenshot techniques[edit]
Digital techniques[edit]
The first screenshots were created with the first interactive computers around 1960.[1] Through the 1980s, computer operating systems did not universally have built-in functionality for capturing screenshots. Sometimes text-only screens could be dumped to a text file, but the result would only capture the content of the screen, not the appearance, nor were graphics screens preservable this way. Some systems had a BSAVE command that could be used to capture the area of memory where screen data was stored, but this required access to a BASIC prompt. Systems with composite video output could be connected to a VCR, and entire screencasts preserved this way.[2]
Most screenshots are raster images, but some vector-based GUI environments like Cairo are capable of generating vector screenshots.[3][4]
Photographic techniques[edit]
Screenshot kits were available for standard (film) cameras that included a long antireflective hood to attach between the screen and camera lens, as well as a closeup lens for the camera. Polaroid film was popular for capturing screenshots, because of the instant results and close-focusing capability of Polaroid cameras. In 1988, Polaroid introduced Spectra film with a 9.2 × 7.3 image size more suited to the 4:3 aspect ratio of CRT screens.
Built-in screenshot functionality[edit]
Android[edit]
Screenshot support was added to Android[5] in version 4.0. In older versions, some devices supported screenshot functionality with one of the following combinations:
- Press and hold the Home+Power
- Press and hold Back+Power
- Press and hold Back and double tap the Home.
Screenshots can be taken by pressing Volume Down+Power, and are saved in the «Screenshot» folder in the gallery after a short sound and visual effect.[5]
On certain devices that use modified Android; the button combination and the storage location can vary.
Also, when a keyboard is connected via USB-OTG, pressing the print screen button will take the screenshot.
There is no direct way to take screenshots[6] programmatically in non-system apps. However, on most devices, apps may use the system screenshot functionality without special permissions.[7]
Amazon Kindle[edit]
On Amazon Kindle devices, one can take a screenshot by:
- Kindle Paperwhite — touch and hold on the top-left and bottom-right corners of the screen (or top-right and bottom-left corners). The screen will flash and the image will be saved in the root folder of Kindle storage.[8]
- Kindle or Kindle Touch – Simply press and hold the Home and then tap anywhere on the screen.
- Kindle Keyboard (Kindle 3 and Kindle DX) – Press alt+⇧ Shift+G
- Kindle Fire 2 and Kindle Fire HD (with volume button) – Press and hold the volume down+power at the same time. Open the Photos app to access the screenshot(s).
- Kindle Fire (no volume buttons) – One needs to connect their Kindle Fire to a computer with the Kindle SDK installed and take a screenshot through the development environment.[9]
ChromeOS[edit]
On Chromebook and related devices with the ChromeOS keyboard layout, pressing the equivalent of Ctrl+F5 on a standard keyboard will capture the entire screen, and the equivalent of Ctrl+⇧ Shift+F5 will turn the mouse into a rectangle select tool for capturing a custom portion of the screen.[citation needed]
HP WebOS[edit]
Screenshots of the HP webOS can be taken. For webOS phones, simultaneously press Orange/Gray Key+Sym+P. For the HP Touchpad, press Home Key+Power+. In either case, screenshots will be saved to the «Screen captures» folder in the «Photos» app.[citation needed]
Linux[edit]
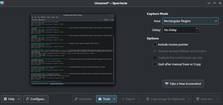
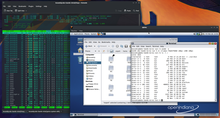
Spectacle, running on Arch Linux

GNOME Screenshot, running on Arch Linux
On KDE or GNOME, PrtScr key behavior is quite similar to Windows. (See § Microsoft Windows.) In addition, the following screenshooting utilities are bundled with Linux distributions:
- GIMP: A raster graphics editor that can take screenshots too[10]
- gnome-screenshot: The default screen grabbing utility in GNOME
- ImageMagick: Has an import command-line tool that captures screenshots in a variety of formats. Type import -window root ~/screenshot.png to capture the entire screen to your home directory.
- Spectacle: The default screen grabbing utility in KDE[11]
- scrot: Allows selecting arbitrary areas of the X screen and windows.
- xwd: The screen capture utility of the X Window System
Apple iOS[edit]
A screenshot can be taken on iOS by simultaneously pressing the Home button and the Lock button from the Original iPhone to the iPhone 8 Plus in addition to the second- and third-generation SE or the iPad models of the iPad (1st generation and later), the iPad Mini up to the 5th generation, the iPad Air up to the 3rd generation, or the first two generations of the iPad Pro or by pressing the Volume up and Lock button since the iPhone X and newer iPhone models and iPad models since the iPad Pro (3rd generation), iPad Air (4th generation), and the iPad Mini (6th generation). The screen will flash and the picture will be stored in PNG format in the «Camera Roll» if the device has a camera, or in «Saved Photos» if the device does not. From the iOS 11 update, a little preview will pop up in the bottom left corner, which can be swiped left to save or clicked to open up an editor where the screenshot can be cropped or doodled on before being saved or shared. The screenshot feature is available with iOS 2.0 and later.[12] The same ⌘ Cmd+⇧ Shift+3 shortcut for Mac OS is used in iOS to take a screenshot, with ⌘ Cmd+⇧ Shift+4 bringing the screenshot directly in iOS’ editing window in iOS 11 and later. Third-party Bluetooth keyboards often have a key or function key command devoted to taking a screenshot.
Apple macOS[edit]
On macOS, a user can take a screenshot of an entire screen by pressing ⌘ Cmd+⇧ Shift+3, or of a chosen area of the screen by ⌘ Cmd+⇧ Shift+4. This screenshot is saved to the user’s desktop, with one PNG file per attached monitor.[13] If the user holds down Ctrl while doing either then the screenshot will be copied to the clipboard instead.
Beginning with Mac OS X Panther, it is possible to make a screenshot of an active application window. By following ⌘ Cmd+⇧ Shift+4, with pressing the Spacebar, the cross-hair cursor turns into a small camera icon. The current window under the cursor is highlighted, and a click on the mouse or trackpad will capture a screenshot of the entire highlighted element (including the parts offscreen or covered by other windows).[14]
A provided application called Grab will capture a chosen area, a whole window, the whole screen, or the whole screen after 10 seconds and pops the screenshot up in a window ready for copying to the clipboard or saving as a TIFF. The Preview application, also provided, has the same capture options as Grab but opens the captured image immediately in a new window.
Since macOS 10.14 Mojave, Apple brought to users a revamped screenshot utility, called Screenshot app.[15] A utility toolbar will show up when users press ⌘ Cmd+⇧ Shift+5.[16] This toolbar allows users to choose capture modes and options to take screenshots. Users can change the default location of saved screenshots from the Options menu in Screenshot app. Besides, this application supports recording Mac screen in full-sized or chosen portion.
A shell utility called «screencapture» (located in /usr/sbin/screencapture) can be used from the Terminal application or in shell scripts to capture screenshots and save them to files. Various options are available to choose the file format of the screenshot, how the screenshot is captured, if sounds are played, etc. This utility might only be available when the macOS developer tools are installed. A user cannot capture the screen while DVD Player is running.
Maemo 5[edit]
On Maemo 5 a screenshot can be taken by pressing Ctrl+⇧ Shift+P simultaneously. Screenshots will be saved as «Screenshot-YYYYMMDD-HHMMSS.png» in «Images/Screenshots» on the internal storage.[citation needed]
Windows[edit]
On Windows, pressing PrtScr captures a screenshot of the entire desktop, while Alt+PrtScr captures only the active window. Captured screenshots do not include the mouse pointer. Windows places these captured screenshots in the clipboard, meaning that an additional program needs to retrieve them from the clipboard. Starting with Windows 8, however, ⊞ Win+PrtScr or ⊞ Win+Volume up instantly saves a screenshot to the «Screenshots» folder in «Pictures» library. All screenshots are saved as PNG files. Note: On some notebooks you have to hold Fn and then press PrtScr instead.[17]
Windows Vista and later include a utility called Snipping Tool, first introduced in Windows XP Tablet PC Edition. It is a screen-capture tool that allows taking screenshots («snips») of a window, rectangular area, or free-form area. Starting with Windows 10, Snipping Tool gained time delay functionality, useful for capturing context menus. Snips can then be annotated, saved as an image file or as an HTML page, or emailed. However, it does not work with non-tablet XP versions but represents an XP compatible equivalent. Windows 7 and later also include Problem Step Recorder as part of their troubleshooting platforms that once started, automatically captures a screenshot at mouse clicks.[18]
There are exceptions to what can be captured by this method. For example, contents in hardware overlay are not captured. This includes video images that Windows Media Player 10 or earlier play. As such, special software may be required to capture the screens of video games.[19]
Windows Phone[edit]
In Windows Phone 8, screenshots can be taken by simultaneously pressing and holding the phone’s Power button and the Start button. The screenshots are saved in the phone’s native screen resolution under «screenshots» in the Photos hub. The screenshot functionality is only available for Windows Phone 8 or later.[20][21]
The screenshot combination for Windows Phone 8.1 and later is the phone’s Power button and the Volume Up button.[21][22]
Xbox One/Series S|X[edit]
As of March 2015, an Xbox One or Xbox Series console can take a screenshot by double-pressing the Nexus button. Pressing the Y button will then save it. The equivalent voice command for this action is «Xbox, take a screenshot».[23][24][25]
PlayStation[edit]
A PlayStation 4 or 5 console can take a screenshot by pressing and holding the SHARE button on a DualShock or DualSense controller.[26]
External tools[edit]
Notable external tools include:
- Bandicam
- Camtasia
- CamStudio
- CloudApp
- Greenshot
- Gyazo
- IrfanView
- Jing
- KSnapshot
- Lightscreen
- Microsoft Snipping Tool
- Monosnap
- PrintKey 2000
- scrot
- ShareX
- Shotty
- Snagit
- Snapz Pro X
- VVCap
- Window Clippings
- Xfire
- XnView
- Xwd
- PicPick
Some web browsers, for example Firefox and Microsoft Edge, have a screenshot tool which can be used to capture a whole web page or part of it.
Common technical issues[edit]
Hardware overlays[edit]
On Windows systems, screenshots of games and media players sometimes fail, resulting in a blank rectangle. The reason for this is that the graphics are bypassing the normal screen and going to a high-speed graphics processor on the graphics card by using a method called hardware overlay. Generally, there is no way to extract a computed image back out of the graphics card,[citation needed] though software may exist for special cases or specific video cards.
One way these images can be captured is to turn off the hardware overlay. Because many computers have no hardware overlay, most programs are built to work without it, just a little slower. In Windows XP, this is disabled by opening the Display Properties menu, clicking on the «Settings» tab, clicking, «Advanced», «Troubleshoot», and moving the Hardware Acceleration Slider to «None.»
Free software media players may also use the overlay but often have a setting to avoid it or have dedicated screenshot functions.
Screen recording[edit]
The screen recording capability of some screen capture programs is a time-saving way to create instructions and presentations, but the resulting files are often large.
A common problem with video recordings is the action jumps, instead of flowing smoothly, due to low frame rate. Though getting faster all the time, ordinary PCs are not yet fast enough to play videos and simultaneously capture them at professional frame rates, i.e. 30 frame/s. For many cases, high frame rates are needed for a pleasant experience.
Copyright issues[edit]
Some companies believe the use of screenshots is an infringement of copyright on their program, as it is a derivative work of the widgets and other art created for the software.[27][28][29] Regardless of copyright, screenshots may still be legally used under the principle of fair use in the U.S. or fair dealing and similar laws in other countries.[30][31]
See also[edit]
- Comparison of screencasting software
- Codeless test automation
- Print screen
- Screencast
- Thumbshot
- Video capture
References[edit]
- ^ Matthew Allen (November–December 2016). «Representing Computer-Aided Design: Screenshots and the Interactive Computer circa 1960». Perspectives on Science. Retrieved 8 January 2017.
- ^ «RUN Magazine issue 25». January 1986.
- ^ «Details of package gtk-vector-screenshot in stretch». Debian. GitHub
- ^ «macos — Is it possible to take a screenshot in vector format?». Ask Different.
- ^ a b «Taking a Screenshot on an Android 4.0 Smartphone». Verizon Wireless. 2012-07-25. Retrieved 2013-10-08.
- ^ Muhammed Swalih (February 2017). «Android Screenshot: A Complete Guide». techquintal.com. Retrieved 1 February 2017.
- ^ «com.android.systemui.screenshot.TakeScreenshotService source code». Google Git. 2013-09-18. Retrieved 2013-10-08.
- ^ Michael Kozlowski (24 January 2013). «How to Take Screenshots on the Kindle Paperwhite». goodereader.com. Retrieved 1 December 2015.
- ^ «Taking Screenshots on Fire Devices — Amazon Apps & Services Developer Portal». amazon.com. Retrieved 1 December 2015.
- ^ «2.3. Create». GIMP User Manual. The GIMP Team. Retrieved 5 March 2014.
- ^ «KDE Ships KDE Applications 15.12.0». KDE. 16 December 2015. Retrieved 1 September 2021.
{{cite web}}: CS1 maint: url-status (link) - ^ «How To: Take a Screenshot With the iPhone». TiPb.com. Retrieved 2011-11-09.
- ^ Imran Alam, Imran (23 March 2018). «How to take a screenshot on mac». answerslave.com. Retrieved 23 March 2018.
- ^ «How to take a screenshot on your Mac». apple.com. Retrieved 22 May 2017.
- ^ «Take pictures or screen recordings using Screenshot». apple.com. Retrieved 10 April 2020.
- ^ «How to take a screenshot on a Mac with shortcut and apps». bytebitebit.com. 15 March 2020. Retrieved 10 April 2020.
- ^ Chen, Raymond (14 January 2014). «How do I hit the Win+PrintScreen hotkey if my tablet doesn’t have a PrtSc key?». The Old New Thing. Microsoft. Retrieved 15 January 2014.
- ^ «How do I use Problem Steps Recorder?». Windows Help. Microsoft. Retrieved 2 March 2014.
- ^ «Overlays Overview». ScreenVirtuoso articles. Fox Magic Software. Retrieved 2 March 2014.
- ^ Edmonds, Rich (6 September 2012). «Screenshot functionality in Windows Phone 8 demonstrated | Windows Phone Central». Wpcentral.com. Retrieved 2013-05-01.
- ^ a b «Take a screenshot». WindowsPhone.com. Microsoft. Retrieved 17 March 2015.
- ^ Cipriani, Jason (13 May 2014). «How to take a screenshot in Windows Phone 8.1». CNET. CBS Interactive. Retrieved 17 March 2015.
- ^ Pitcher, Jenna (18 February 2015). «Xbox One March System Update Preview Adds Screenshot Feature». IGN. Ziff Davis.
- ^ Nelson, Major (18 February 2015). «Xbox One March System Update: Screenshots and Suggested Friends Now Available in Preview». xbox.com. Microsoft.
- ^ «Capture Screenshots on Xbox One | Xbox One Console». support.xbox.com. Retrieved 2015-06-29.
- ^ «The PlayStation guide to sharing».
- ^ «Screen Shots (Excluding Xbox)». Use of Microsoft Copyrighted Content. Retrieved 2007-08-22.
- ^ «Use Snipping Tool to capture screenshots». Microsoft. Retrieved 1 September 2021.
{{cite web}}: CS1 maint: url-status (link) - ^ «Question: What are screenshots, and is using them copyright infringement?». FAQ about Copyright — Chilling Effects Clearinghouse. Retrieved 2007-08-22.
- ^ «Copyright in screenshots? Who owns it?». MetaFilter. Retrieved 2007-08-22.
- ^ «Ask the Law Geek: Is publishing screenshots Fair Use?». Lifehacker. 10 August 2006. Retrieved 2007-08-22.
External links[edit]
- Use Snipping Tool to capture screenshots at Microsoft
A screenshot of a computer display
A screenshot (also known as screen capture or screen grab) is a digital image that shows the contents of a computer display. A screenshot is created by the operating system or software running on the device powering the display.
Additionally, screenshots can be captured by an external camera, using photography to capture contents on the screen.
Screenshot techniques[edit]
Digital techniques[edit]
The first screenshots were created with the first interactive computers around 1960.[1] Through the 1980s, computer operating systems did not universally have built-in functionality for capturing screenshots. Sometimes text-only screens could be dumped to a text file, but the result would only capture the content of the screen, not the appearance, nor were graphics screens preservable this way. Some systems had a BSAVE command that could be used to capture the area of memory where screen data was stored, but this required access to a BASIC prompt. Systems with composite video output could be connected to a VCR, and entire screencasts preserved this way.[2]
Most screenshots are raster images, but some vector-based GUI environments like Cairo are capable of generating vector screenshots.[3][4]
Photographic techniques[edit]
Screenshot kits were available for standard (film) cameras that included a long antireflective hood to attach between the screen and camera lens, as well as a closeup lens for the camera. Polaroid film was popular for capturing screenshots, because of the instant results and close-focusing capability of Polaroid cameras. In 1988, Polaroid introduced Spectra film with a 9.2 × 7.3 image size more suited to the 4:3 aspect ratio of CRT screens.
Built-in screenshot functionality[edit]
Android[edit]
Screenshot support was added to Android[5] in version 4.0. In older versions, some devices supported screenshot functionality with one of the following combinations:
- Press and hold the Home+Power
- Press and hold Back+Power
- Press and hold Back and double tap the Home.
Screenshots can be taken by pressing Volume Down+Power, and are saved in the «Screenshot» folder in the gallery after a short sound and visual effect.[5]
On certain devices that use modified Android; the button combination and the storage location can vary.
Also, when a keyboard is connected via USB-OTG, pressing the print screen button will take the screenshot.
There is no direct way to take screenshots[6] programmatically in non-system apps. However, on most devices, apps may use the system screenshot functionality without special permissions.[7]
Amazon Kindle[edit]
On Amazon Kindle devices, one can take a screenshot by:
- Kindle Paperwhite — touch and hold on the top-left and bottom-right corners of the screen (or top-right and bottom-left corners). The screen will flash and the image will be saved in the root folder of Kindle storage.[8]
- Kindle or Kindle Touch – Simply press and hold the Home and then tap anywhere on the screen.
- Kindle Keyboard (Kindle 3 and Kindle DX) – Press alt+⇧ Shift+G
- Kindle Fire 2 and Kindle Fire HD (with volume button) – Press and hold the volume down+power at the same time. Open the Photos app to access the screenshot(s).
- Kindle Fire (no volume buttons) – One needs to connect their Kindle Fire to a computer with the Kindle SDK installed and take a screenshot through the development environment.[9]
ChromeOS[edit]
On Chromebook and related devices with the ChromeOS keyboard layout, pressing the equivalent of Ctrl+F5 on a standard keyboard will capture the entire screen, and the equivalent of Ctrl+⇧ Shift+F5 will turn the mouse into a rectangle select tool for capturing a custom portion of the screen.[citation needed]
HP WebOS[edit]
Screenshots of the HP webOS can be taken. For webOS phones, simultaneously press Orange/Gray Key+Sym+P. For the HP Touchpad, press Home Key+Power+. In either case, screenshots will be saved to the «Screen captures» folder in the «Photos» app.[citation needed]
Linux[edit]
Spectacle, running on Arch Linux
GNOME Screenshot, running on Arch Linux
On KDE or GNOME, PrtScr key behavior is quite similar to Windows. (See § Microsoft Windows.) In addition, the following screenshooting utilities are bundled with Linux distributions:
- GIMP: A raster graphics editor that can take screenshots too[10]
- gnome-screenshot: The default screen grabbing utility in GNOME
- ImageMagick: Has an import command-line tool that captures screenshots in a variety of formats. Type import -window root ~/screenshot.png to capture the entire screen to your home directory.
- Spectacle: The default screen grabbing utility in KDE[11]
- scrot: Allows selecting arbitrary areas of the X screen and windows.
- xwd: The screen capture utility of the X Window System
Apple iOS[edit]
A screenshot can be taken on iOS by simultaneously pressing the Home button and the Lock button from the Original iPhone to the iPhone 8 Plus in addition to the second- and third-generation SE or the iPad models of the iPad (1st generation and later), the iPad Mini up to the 5th generation, the iPad Air up to the 3rd generation, or the first two generations of the iPad Pro or by pressing the Volume up and Lock button since the iPhone X and newer iPhone models and iPad models since the iPad Pro (3rd generation), iPad Air (4th generation), and the iPad Mini (6th generation). The screen will flash and the picture will be stored in PNG format in the «Camera Roll» if the device has a camera, or in «Saved Photos» if the device does not. From the iOS 11 update, a little preview will pop up in the bottom left corner, which can be swiped left to save or clicked to open up an editor where the screenshot can be cropped or doodled on before being saved or shared. The screenshot feature is available with iOS 2.0 and later.[12] The same ⌘ Cmd+⇧ Shift+3 shortcut for Mac OS is used in iOS to take a screenshot, with ⌘ Cmd+⇧ Shift+4 bringing the screenshot directly in iOS’ editing window in iOS 11 and later. Third-party Bluetooth keyboards often have a key or function key command devoted to taking a screenshot.
Apple macOS[edit]
On macOS, a user can take a screenshot of an entire screen by pressing ⌘ Cmd+⇧ Shift+3, or of a chosen area of the screen by ⌘ Cmd+⇧ Shift+4. This screenshot is saved to the user’s desktop, with one PNG file per attached monitor.[13] If the user holds down Ctrl while doing either then the screenshot will be copied to the clipboard instead.
Beginning with Mac OS X Panther, it is possible to make a screenshot of an active application window. By following ⌘ Cmd+⇧ Shift+4, with pressing the Spacebar, the cross-hair cursor turns into a small camera icon. The current window under the cursor is highlighted, and a click on the mouse or trackpad will capture a screenshot of the entire highlighted element (including the parts offscreen or covered by other windows).[14]
A provided application called Grab will capture a chosen area, a whole window, the whole screen, or the whole screen after 10 seconds and pops the screenshot up in a window ready for copying to the clipboard or saving as a TIFF. The Preview application, also provided, has the same capture options as Grab but opens the captured image immediately in a new window.
Since macOS 10.14 Mojave, Apple brought to users a revamped screenshot utility, called Screenshot app.[15] A utility toolbar will show up when users press ⌘ Cmd+⇧ Shift+5.[16] This toolbar allows users to choose capture modes and options to take screenshots. Users can change the default location of saved screenshots from the Options menu in Screenshot app. Besides, this application supports recording Mac screen in full-sized or chosen portion.
A shell utility called «screencapture» (located in /usr/sbin/screencapture) can be used from the Terminal application or in shell scripts to capture screenshots and save them to files. Various options are available to choose the file format of the screenshot, how the screenshot is captured, if sounds are played, etc. This utility might only be available when the macOS developer tools are installed. A user cannot capture the screen while DVD Player is running.
Maemo 5[edit]
On Maemo 5 a screenshot can be taken by pressing Ctrl+⇧ Shift+P simultaneously. Screenshots will be saved as «Screenshot-YYYYMMDD-HHMMSS.png» in «Images/Screenshots» on the internal storage.[citation needed]
Windows[edit]
On Windows, pressing PrtScr captures a screenshot of the entire desktop, while Alt+PrtScr captures only the active window. Captured screenshots do not include the mouse pointer. Windows places these captured screenshots in the clipboard, meaning that an additional program needs to retrieve them from the clipboard. Starting with Windows 8, however, ⊞ Win+PrtScr or ⊞ Win+Volume up instantly saves a screenshot to the «Screenshots» folder in «Pictures» library. All screenshots are saved as PNG files. Note: On some notebooks you have to hold Fn and then press PrtScr instead.[17]
Windows Vista and later include a utility called Snipping Tool, first introduced in Windows XP Tablet PC Edition. It is a screen-capture tool that allows taking screenshots («snips») of a window, rectangular area, or free-form area. Starting with Windows 10, Snipping Tool gained time delay functionality, useful for capturing context menus. Snips can then be annotated, saved as an image file or as an HTML page, or emailed. However, it does not work with non-tablet XP versions but represents an XP compatible equivalent. Windows 7 and later also include Problem Step Recorder as part of their troubleshooting platforms that once started, automatically captures a screenshot at mouse clicks.[18]
There are exceptions to what can be captured by this method. For example, contents in hardware overlay are not captured. This includes video images that Windows Media Player 10 or earlier play. As such, special software may be required to capture the screens of video games.[19]
Windows Phone[edit]
In Windows Phone 8, screenshots can be taken by simultaneously pressing and holding the phone’s Power button and the Start button. The screenshots are saved in the phone’s native screen resolution under «screenshots» in the Photos hub. The screenshot functionality is only available for Windows Phone 8 or later.[20][21]
The screenshot combination for Windows Phone 8.1 and later is the phone’s Power button and the Volume Up button.[21][22]
Xbox One/Series S|X[edit]
As of March 2015, an Xbox One or Xbox Series console can take a screenshot by double-pressing the Nexus button. Pressing the Y button will then save it. The equivalent voice command for this action is «Xbox, take a screenshot».[23][24][25]
PlayStation[edit]
A PlayStation 4 or 5 console can take a screenshot by pressing and holding the SHARE button on a DualShock or DualSense controller.[26]
External tools[edit]
Notable external tools include:
- Bandicam
- Camtasia
- CamStudio
- CloudApp
- Greenshot
- Gyazo
- IrfanView
- Jing
- KSnapshot
- Lightscreen
- Microsoft Snipping Tool
- Monosnap
- PrintKey 2000
- scrot
- ShareX
- Shotty
- Snagit
- Snapz Pro X
- VVCap
- Window Clippings
- Xfire
- XnView
- Xwd
- PicPick
Some web browsers, for example Firefox and Microsoft Edge, have a screenshot tool which can be used to capture a whole web page or part of it.
Common technical issues[edit]
Hardware overlays[edit]
On Windows systems, screenshots of games and media players sometimes fail, resulting in a blank rectangle. The reason for this is that the graphics are bypassing the normal screen and going to a high-speed graphics processor on the graphics card by using a method called hardware overlay. Generally, there is no way to extract a computed image back out of the graphics card,[citation needed] though software may exist for special cases or specific video cards.
One way these images can be captured is to turn off the hardware overlay. Because many computers have no hardware overlay, most programs are built to work without it, just a little slower. In Windows XP, this is disabled by opening the Display Properties menu, clicking on the «Settings» tab, clicking, «Advanced», «Troubleshoot», and moving the Hardware Acceleration Slider to «None.»
Free software media players may also use the overlay but often have a setting to avoid it or have dedicated screenshot functions.
Screen recording[edit]
The screen recording capability of some screen capture programs is a time-saving way to create instructions and presentations, but the resulting files are often large.
A common problem with video recordings is the action jumps, instead of flowing smoothly, due to low frame rate. Though getting faster all the time, ordinary PCs are not yet fast enough to play videos and simultaneously capture them at professional frame rates, i.e. 30 frame/s. For many cases, high frame rates are needed for a pleasant experience.
Copyright issues[edit]
Some companies believe the use of screenshots is an infringement of copyright on their program, as it is a derivative work of the widgets and other art created for the software.[27][28][29] Regardless of copyright, screenshots may still be legally used under the principle of fair use in the U.S. or fair dealing and similar laws in other countries.[30][31]
See also[edit]
- Comparison of screencasting software
- Codeless test automation
- Print screen
- Screencast
- Thumbshot
- Video capture
References[edit]
- ^ Matthew Allen (November–December 2016). «Representing Computer-Aided Design: Screenshots and the Interactive Computer circa 1960». Perspectives on Science. Retrieved 8 January 2017.
- ^ «RUN Magazine issue 25». January 1986.
- ^ «Details of package gtk-vector-screenshot in stretch». Debian. GitHub
- ^ «macos — Is it possible to take a screenshot in vector format?». Ask Different.
- ^ a b «Taking a Screenshot on an Android 4.0 Smartphone». Verizon Wireless. 2012-07-25. Retrieved 2013-10-08.
- ^ Muhammed Swalih (February 2017). «Android Screenshot: A Complete Guide». techquintal.com. Retrieved 1 February 2017.
- ^ «com.android.systemui.screenshot.TakeScreenshotService source code». Google Git. 2013-09-18. Retrieved 2013-10-08.
- ^ Michael Kozlowski (24 January 2013). «How to Take Screenshots on the Kindle Paperwhite». goodereader.com. Retrieved 1 December 2015.
- ^ «Taking Screenshots on Fire Devices — Amazon Apps & Services Developer Portal». amazon.com. Retrieved 1 December 2015.
- ^ «2.3. Create». GIMP User Manual. The GIMP Team. Retrieved 5 March 2014.
- ^ «KDE Ships KDE Applications 15.12.0». KDE. 16 December 2015. Retrieved 1 September 2021.
{{cite web}}: CS1 maint: url-status (link) - ^ «How To: Take a Screenshot With the iPhone». TiPb.com. Retrieved 2011-11-09.
- ^ Imran Alam, Imran (23 March 2018). «How to take a screenshot on mac». answerslave.com. Retrieved 23 March 2018.
- ^ «How to take a screenshot on your Mac». apple.com. Retrieved 22 May 2017.
- ^ «Take pictures or screen recordings using Screenshot». apple.com. Retrieved 10 April 2020.
- ^ «How to take a screenshot on a Mac with shortcut and apps». bytebitebit.com. 15 March 2020. Retrieved 10 April 2020.
- ^ Chen, Raymond (14 January 2014). «How do I hit the Win+PrintScreen hotkey if my tablet doesn’t have a PrtSc key?». The Old New Thing. Microsoft. Retrieved 15 January 2014.
- ^ «How do I use Problem Steps Recorder?». Windows Help. Microsoft. Retrieved 2 March 2014.
- ^ «Overlays Overview». ScreenVirtuoso articles. Fox Magic Software. Retrieved 2 March 2014.
- ^ Edmonds, Rich (6 September 2012). «Screenshot functionality in Windows Phone 8 demonstrated | Windows Phone Central». Wpcentral.com. Retrieved 2013-05-01.
- ^ a b «Take a screenshot». WindowsPhone.com. Microsoft. Retrieved 17 March 2015.
- ^ Cipriani, Jason (13 May 2014). «How to take a screenshot in Windows Phone 8.1». CNET. CBS Interactive. Retrieved 17 March 2015.
- ^ Pitcher, Jenna (18 February 2015). «Xbox One March System Update Preview Adds Screenshot Feature». IGN. Ziff Davis.
- ^ Nelson, Major (18 February 2015). «Xbox One March System Update: Screenshots and Suggested Friends Now Available in Preview». xbox.com. Microsoft.
- ^ «Capture Screenshots on Xbox One | Xbox One Console». support.xbox.com. Retrieved 2015-06-29.
- ^ «The PlayStation guide to sharing».
- ^ «Screen Shots (Excluding Xbox)». Use of Microsoft Copyrighted Content. Retrieved 2007-08-22.
- ^ «Use Snipping Tool to capture screenshots». Microsoft. Retrieved 1 September 2021.
{{cite web}}: CS1 maint: url-status (link) - ^ «Question: What are screenshots, and is using them copyright infringement?». FAQ about Copyright — Chilling Effects Clearinghouse. Retrieved 2007-08-22.
- ^ «Copyright in screenshots? Who owns it?». MetaFilter. Retrieved 2007-08-22.
- ^ «Ask the Law Geek: Is publishing screenshots Fair Use?». Lifehacker. 10 August 2006. Retrieved 2007-08-22.
External links[edit]
- Use Snipping Tool to capture screenshots at Microsoft

Как сделать скриншот на компьютере и ноутбуке
Скриншот — полезная опция и является обычным снимком экрана. Его можно сделать в любое время и сохранить на жестком диске.
Клавиша для быстрых снимков
Чем же эта функция может быть полезна?
Если возникла трудность в работе с ПК — сделайте скриншот и отправьте специалисту по почте.
Если вы создаете обучающий урок — то при помощи скриншотов можно вставить в него для большей наглядности фотографии.
Во время интернет-серфинга вы можете сохранить у себя на компьютере интересную информацию или фотографию, или при той или иной ошибке во время работы за компьютером, чтобы показать ее мастеру.
И здесь вам могут помочь скрины.
Как сделать скриншот на компьютере
Проще всего сделать скрин стандартными средствами Виндовс.
к оглавлению ↑
Создание скриншотов стандартными средствами Виндовс
Вы постоянно видите на клавиатуре кнопку с надписью PrtSc.
Некоторые клавиатуры могут содержать другое название этой клавиши — PrtnScrn», PrtScn или Print Screen.
Это не столь важно, так как функцию они выполняют одну и ту же.

Расположение клавиши Print Screen на клавиатуре
Если вы еще с ней не сталкивались — знайте, что именно она отвечает за создание экранных снимков.
Нажмите на кнопку «Принтскрин» для создания скриншота.
Не пугайтесь, что никаких видимых изменений не произошло.
Снимок экрана монитора создан и помещен в буфер обмена вашего компьютера. Вам останется только извлечь его оттуда.
В случае использования ноутбука понадобится воспользоваться комбинацией клавиш Fn + PrtSc.
Это от того, что ноутбуки, чаще всего, располагают урезанным вариантом клавиатуры.
Из-за этого многие функции на них доступны в сочетании с дополнительной клавишей Fn.

Клавиши для создания скрина на клавиатуре ноутбука
к оглавлению ↑
Вставка и сохранение снимка экрана
Для того, чтобы помещенный в буфер обмена снимок можно было увидеть — сохраните его отдельным файлом.
Запустите на компьютере какой-нибудь стандартный редактор (например, Paint) и воспользуйтесь комбинацией клавиш Ctrl + V.
С ее помощью происходит вставка содержимого буфера в рабочее окно редактора.

Сочетание клавиш для вставки скрина
После того, как изображение будет вставлено в редактор — нажмите одновременно клавиши Ctrl + S для его сохранения.
В диалоговом окне «Сохранить как» — придумайте имя файла и сохраните в нужном формате
Если вам нужен скриншот не всего экрана, а только активного окна (окна открытой на данный момент программы) — используйте на клавиатуре сочетание клавиш Alt + Print Screen.
При использовании ноутбука нажмите клавиши Alt + Fn + PrtScrn.
Мы рассмотрели одну из возможностей как сделать скриншот экрана на компьютере.
Рассмотрим эту возможность на различных операционных системах Виндовс.
к оглавлению ↑
Создание снимка экрана в Windows XP
Начнем с того, как сделать скриншот на компьютере Windows XP.
Для его создания жмете на клавишу Print Screen, сохраняя изображение всего экрана в буфер обмена.
Далее выбираете один из стандартных редакторов. Для этого кликаете по кнопке ПУСК и переходите в пункт Все программы.
Среди имеющегося списка доступных программ жмите на Paint.
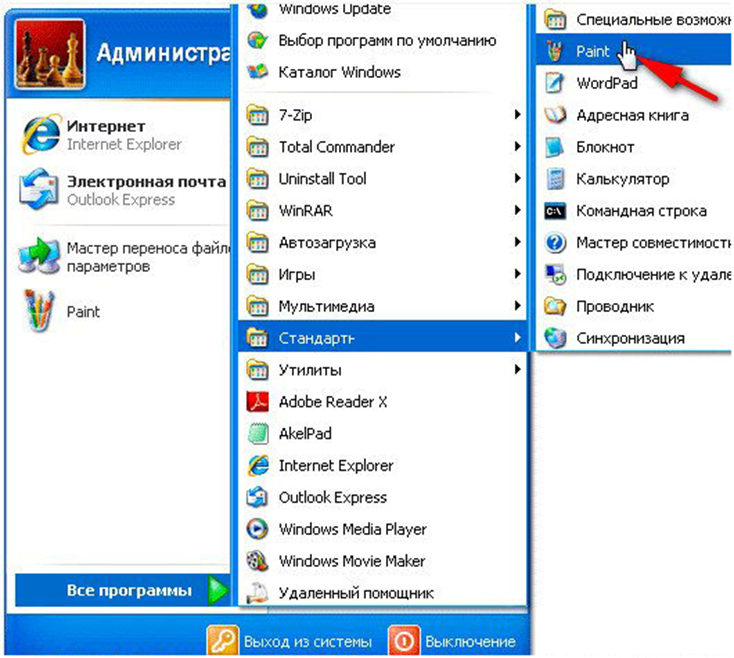
Выбор редактора Paint в Windows XP
В открывшемся окне редактора переходите в пункт меню Правка.
Этот пункт расположен в верхней части рабочего окна программы. Затем выбираете Вставить.
После этого изображение из буфера обмена будет перемещено в окно редактора.
И хотя Paint является достаточно простой программой — в нем вы сможете произвести с картинкой первоначальное редактирование (если в этом появится необходимость). Выделите нужные части текста для скриншота и вырежьте их
Наложить поверх основной картинки текст или нарисовать какую-нибудь фигуру. В общем — это на ваше усмотрение.
По окончанию редактирования сохраните полученный результат.
Для этого выберите пункт меню Файл и далее — Сохранить как. Из появившегося списка доступных для сохранения форматов выберите наиболее подходящий (PNG, JPEG, BMP, GIF).
В открывшемся окне сохранения файла впишите в специальное поле его имя (на ваше усмотрение) и тип.
Для завершения процесса сохранения нажмите кнопку Сохранить.
Теперь давайте разберем, как сделать скриншот экрана компьютера Windows 7.
к оглавлению ↑
Создание снимка экрана в Windows 7
Стандартное создание экранного снимка любой ОС Виндовс практически одинаково. Windows 7 в этом не исключение.
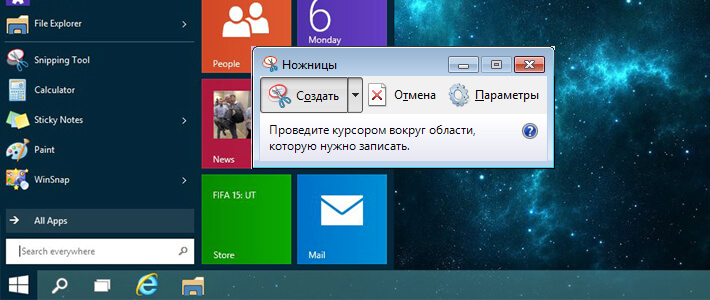
Однако, эта операционная система имеет такой интересный инструмент, как «Ножницы». Давайте рассмотрим подробнее.

Превью программы «Ножницы»
Для начала необходимо открыть данную программу. Для этого зайдите в меню ПУСК и выберите пункт Все программы.
После этого перейдите на вкладку со стандартными программами.
Среди присутствующего списка выберите «Ножницы».
Когда вы запустите эту программу — на экране появится небольшого размера окно.
На нем расположены следующие кнопки меню:
- создать;
- отмена;
- параметры.
Остальная область экрана монитора становится слегка затуманенной.
Нажмите на кнопку Создать, которая содержит выпадающий список.
Здесь присутствуют следующие инструменты:
- произвольная форма;
- прямоугольник;
- окно;
- весь экран.
к оглавлению ↑
Варианты создания снимка
При выборе пункта «Произвольная форма» вы сможете указателем мыши нарисовать на экране любую замкнутую область. Из нее и будет создан скриншот.
Если выбрать вариант «Прямоугольник» — то при помощи мыши можно сделать прямоугольное выделение.

Меню «Окно» даст возможность сделать скрин того, что активно сейчас.
Чтобы скопировать все изображение — воспользуйтесь опцией — «Весь экран»
Итак, если выбран вариант с произвольной формой — то все, что от вас потребуется — это зажать левую кнопку мыши и начать рисовать. Курсор в это время примет вид натуральных ножниц.
Соединив начальную и последнюю точки произвольной фигуры, вы создадите область, подлежащую копированию.
Она сразу же отобразится в окне программы «Ножницы».
Программа «Ножницы»
Здесь вам будут доступны некоторые средства для начального редактирования созданного изображения.
Окно программы содержит следующие пункты меню:
- Создать —с помощью данной опции вы сможете создать новую область копирования
- Сохранить — выбрав эту кнопку, вы сможете сохранить созданный фрагмент на своем компьютере. Для этого в открывшемся окне укажите имя файла и предпочтительное расширение;
- Копировать — позволяет сохранить изображение в буфере обмена для последующей вставки в любую другую программу (например, Фотошоп);
- Отправить фрагмент. Существует возможность отправки скриншота по почте;
- Инструменты. Пункт содержит небольшой набор инструментов для рисования и редактирования. Также можно удалить ненужный фрагмент;
- Маркер — позволяет закрасить желтым цветом задний фон;
- Резинка. Позволяет удалить нарисованное вами изображение.

Меню программы
Проведя все необходимые изменения сохраните созданный скриншот в любое удобное место, в графический редактор Paint или Microsoft Word.
к оглавлению ↑
Создание быстрого снимка Виндовс 8
Для того, чтобы запечатлеть весь рабочий стол нужно воспользоваться сочетанием клавиш Windows + Print Screen.
В этом случае будет создано изображение всего экрана. Оно будет автоматически сохранено в паке «Снимки экрана», расположенной на вкладке «Изображения».
Сохраненный файл будет иметь расширение JPEG. Каждый последующий снимок будет иметь свою нумерацию.
Присвоенное скриншоту имя вы сможете в любое время заменить.
Если понадобится создать скрин определенной области экрана или сделать его произвольной формы — воспользуйтесь стандартной программой «Ножницы».
Работа с ней была описана в предыдущем разделе.
Чтобы найти эту программу — войдите в меню ПУСК и выберите пункт отображения всех приложений.
Кликните правой кнопкой мыши по программе «Ножницы» и закрепите ее на начальном экране.
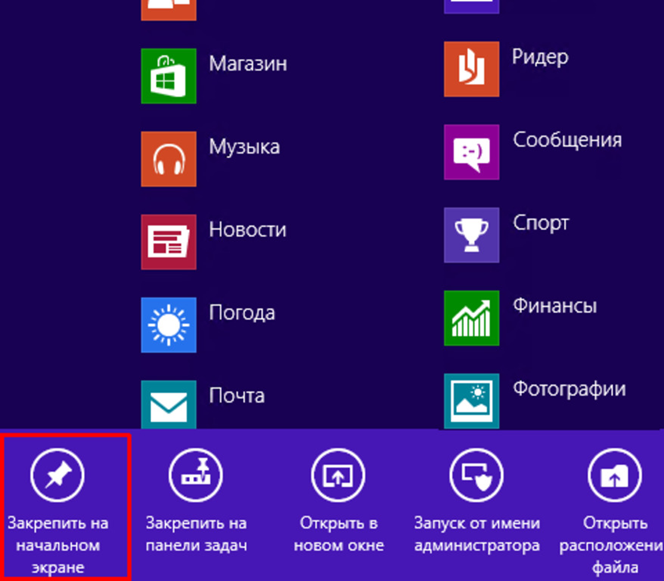
Закрепление программы на начальном экране
При необходимости можете закрепить ее ярлык на панели задач.
Можно также поместить иконку программы на рабочий стол.
Для этого кликните правой кнопкой мыши по значку «Ножницы» и выберите пункт «Открыть расположение файла».
После этого откроется окно со стандартными программами.
Кликните по значку ножниц и в появившемся списке укажите «Отправить на рабочий стол (создать ярлык)».
Данный софт у вас в распоряжении в любое время.
к оглавлению ↑
Варианты создания скринов Windows 10
Десятка имеет большие функциональные возможности как в обычном плане, так и в создании экранных снимков.
Их можно делать путем знакомого уже сочетания клавиш Windows + Print Screen.
В этом случае система автоматически сохранит файл с расширением PNG в папке «Снимки экрана».
Для ее открытия перейдите на вкладку «Мой компьютер», а далее — «Изображения».
Еще одним способом является задействование клавиш Windows + H. В данном случае снимок сохранится в «облаке».
В правой части экрана откроется боковая панель, на которой вы сможете выбрать вариант использования сделанного скриншота.
Данный список содержит следующие варианты:
- OneNote;
- Twitter;
- почта;
- сообщения.

Окно использования экранного снимка
Сделать и отредактировать снимок экрана можно нажатием клавиши Print Screen.
В этом случае изображение будет находиться в буфере обмена.
Откройте стандартный редактор Paint и с помощью сочетания клавиш Ctrl + V вставьте его в рабочее окно программы.
При необходимости проведите его редактирование и сохранение.
Сделать скрин активного окна, можно и при помощи комбинации Alt + Print Screen.
При одновременном нажатии этих клавиш произойдет создание скриншота активного окна в момент нажатия. Очень удобный способ, не делать снимок целого экрана.
Этот вариант понравится тем, кто привык работать с большим количеством открытых окон.
Создание скриншота
В Windows 10 можно использовать сочетание клавиш Win + G. В этом случае откроется специальная игровая панель.
Она позволяет записывать видео и делать скрины во время игрового процесса.
Для этого понадобится одновременно нажать Win + Alt + Print Screen.

Игровая панель
Для создания скрина можно воспользоваться так же стандартной программой «Ножницы». Работа с ней ранее была описана.
Вариантов как сделать скриншоты — очень много. Однако, на стандартных инструментах список не заканчивается.
к оглавлению ↑
Дополнительные программы для создания скриншотов
к оглавлению ↑
Microsoft Snip
Этот менеджер скриншотов является бесплатным. Его можно скачать с официального сайта компании Майкрософт.
Он позволяет делать снимки как отдельных окон и всего экрана, так и выборочных фрагментов.
с его помощью вы сможете записывать даже видео с отображением различных пометок.
Это очень полезно при создании обучающих видеороликов и различного рода презентаций.
К ним можно добавлять и звуковое сопровождение.

Рабочее окно приложения Microsoft Snip
Скачать
к оглавлению ↑
Lightshot
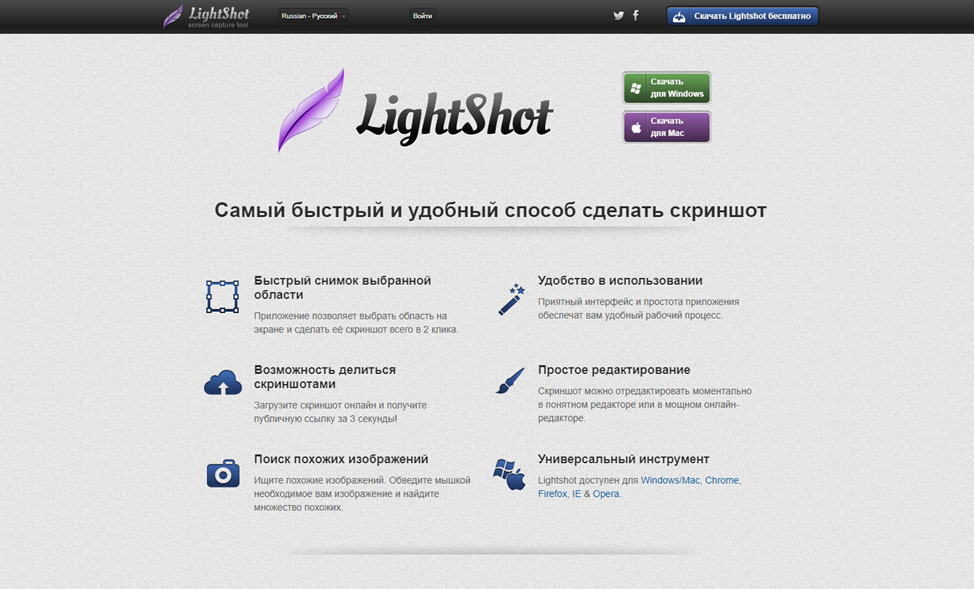
Рабочее окно сервиса Lightshot
«Лайтшот» поможет без труда сделать скриншот.
После скачивания и установки в правой нижней части экрана появится логотип программы в виде пера.
Теперь после нажатия клавиши Print Screen она будет автоматически запускаться.
Экран монитора немного потемнеет, а вам останется лишь обвести сохраняемую область.
Для этого установите курсор в какое-либо место на экране и, зажав левую кнопку мыши, растяните пунктирное выделение.
Обозначенный участок можно изменять в размере, а инструмент выделения можно произвольно перенести по экрану монитора.
После того, как вы отпустите кнопку мыши, на границе выделения появится панель с инструментами и доступными действиями.
Благодаря этим инструментам вы сможете добавить к скрину рисунок, фигуру или текст.
Выбрать для них цвет, если нужно — отмените свои предыдущие действия.
Из возможных действий вам будет доступно следующее:
- Загрузить изображение на сервис prntscr.com;
- Поделиться им в социальных сетях;
- Найти подобные картинки в Google;
- Распечатать картинку;
- Скопировать в буфер обмена;
- Сохранить скриншот на компьютере;
- Закрыть окно программы без сохранения снимка.
Программа очень простая и не требует специальных навыков.
Скачать
к оглавлению ↑
FastStone Capture
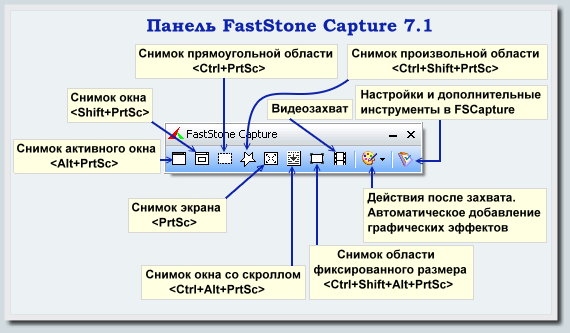
Назначение кнопок рабочей панели
Простая в использовании программа позволяет делать снимки экрана, а также записывать видео.
После запуска откроется рабочая панель с инструментами.
Созданный скриншот можно открыть в редакторе программы для последующей коррекции и сохранения.

Редактор FastStone
Скачать
к оглавлению ↑
Приложение SnagIt
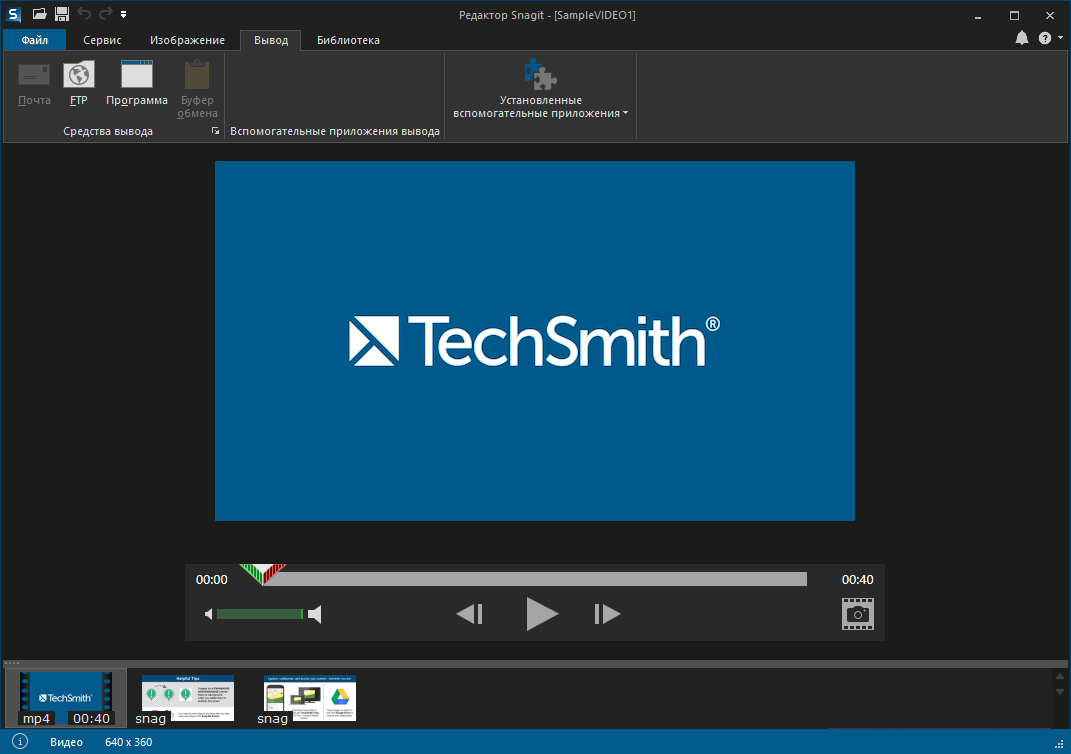
Редактор программы
Замечательно подходит для создания скринов как всей области экрана, так и его отдельных участков.
Позволяет применять к изображению различные эффекты.
Можно добавить различные фигуры, рамки и иконки, а также включать или выключать тень.
Имеет свой собственный встроенный редактор.
Скачать
к оглавлению ↑
Инструмент для создания снимков Screenshot Captor
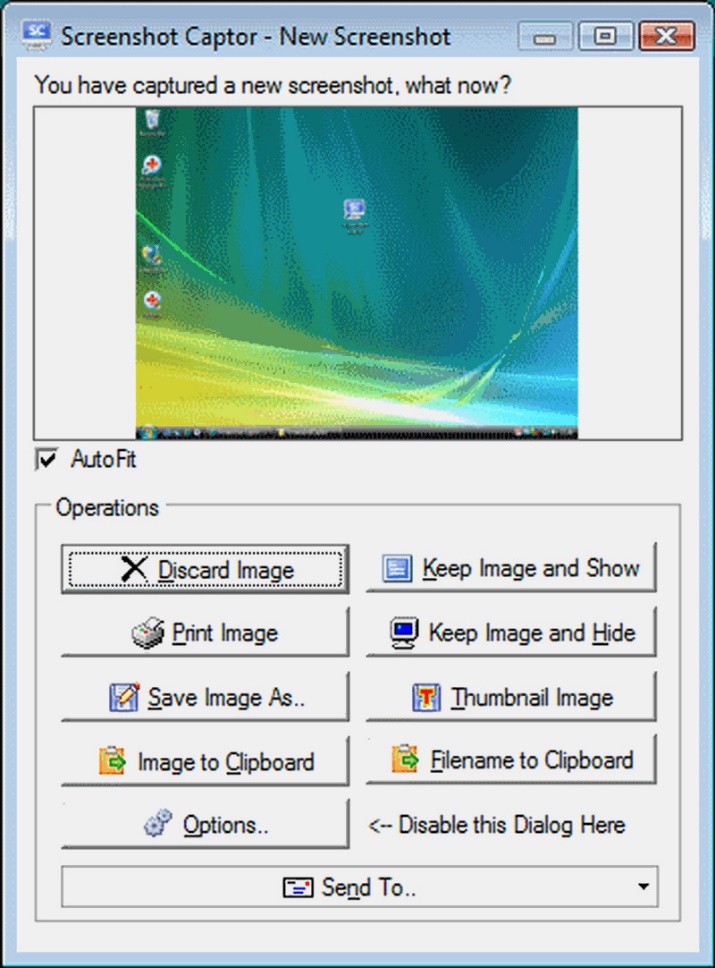
Окно программы
Позволяет делать различные скриншоты — всего экрана, активного окна, произвольной формы и многое другое.
Имеет много полезных настроек. С ее помощью вы без труда сможете делать скрины сразу нескольких экранов.
Полученное изображение можно редактировать, применив к нему обрезку, изменение размера и имеющиеся эффекты.
Скачать